

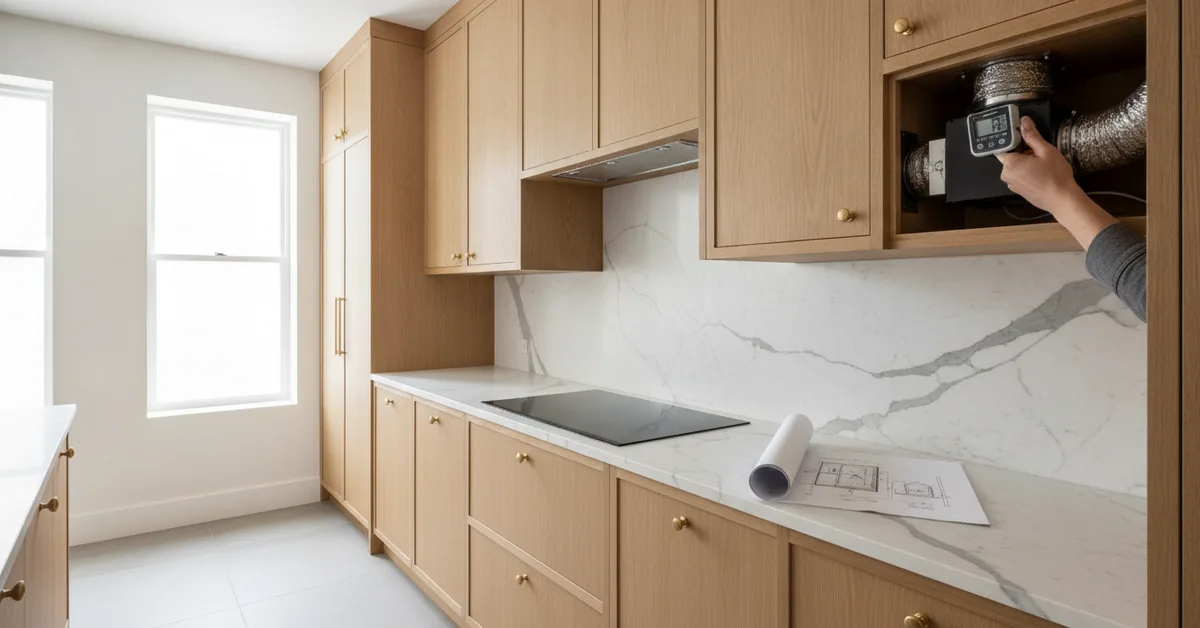
Last year, I was called to a gorgeous estate in the Pacific Northwest to inspect a high-end kitchen completed just eighteen months prior. The rift-sawn white oak cabinets, which cost the homeowner upwards of sixty thousand dollars, were already showing signs of severe distress: warped doors near the range, peeling finish on the underside of the upper cabinets, and a faint, musty odor lingering near the built-in refrigerator. The culprit was not the quality of the wood or the skill of the bench carpenter; it was a complete lack of ventilation planning. In our pursuit of seamless, ultra-minimalist designs, we often forget that cabinetry is a living, breathing component of a home's ecosystem that must coexist with heat, moisture, and airflow.
The Core Pillars of Cabinetry Ventilation Planning
Moisture Mitigation: Diverting steam from cooktops and dishwashers to prevent wood fiber saturation, finish
- Moisture Mitigation: Diverting steam from cooktops and dishwashers to prevent wood fiber saturation, finish degradation, and mold growth.
- Appliance Heat Dissipation: Creating dedicated air paths for integrated appliances like refrigerators and ovens to prevent premature compressor failure.
- HVAC and Register Integration: Ensuring toe-kick vents and wall registers are seamlessly redirected without choking the home's heating and cooling systems.
- Material Selection and Joinery: Utilizing stable substrates and specialized joinery techniques in high-exposure zones to accommodate inevitable micro-movements.
The Hidden Enemy: How Heat and Moisture Destroy Custom Millwork
Wood is hygroscopic, meaning it constantly absorbs and releases moisture to align with its surrounding environment. When we install custom cabinetry around modern, high-output appliances, we subject these delicate wood structures to extreme microclimates. A high-end professional gas range can produce intense ambient heat, while a dishwasher releases bursts of saturated steam at temperatures exceeding one hundred and forty degrees Fahrenheit.
Without a engineered escape route, this heat and moisture collect on the undersides and edges of your cabinetry. Over time, this exposure breaks down even the most durable catalyzed conversion varnishes. Once the finish is compromised, moisture penetrates the wood grain, causing irreversible swelling, joint separation, and warping along the door panels. In my shop, we pre-seal every raw edge—even those that will be hidden against a wall—to create a secondary defense system against this inevitable atmospheric assault.
Designing for Integrated Appliances: The Zero-Clearance Myth
Appliance manufacturers love to showcase sleek, flush-mount refrigerators and column freezers that look completely integrated into the surrounding millwork. However, as a cabinet maker, I can tell you that "zero-clearance" is often a marketing term rather than a mechanical reality. Every compressor generates heat, and that heat must go somewhere. If you trap that heat inside a sealed wood cavity, the appliance will run continuously, skyrocket your utility bills, and likely fail within a few years while slowly baking your custom panels from the inside out.
| Appliance Type | Typical Heat Output (BTU/hr) | Required Air Intake Location | Required Air Exhaust Path | Minimum Airflow Clearance |
|---|---|---|---|---|
| Integrated Refrigerator | 800 - 1,200 | Toe-kick / Plinth grille | Top cabinet gap or chimney flue | 200 cm² (approx. 31 sq. in.) |
| Double Wall Oven | 1,500 - 2,500 | Bottom cabinet reveal | Top decorative valance or vent slot | 280 cm² (approx. 43 sq. in.) |
| Built-in Microwave / Speed Oven | 500 - 800 | Face frame gap | Rear utility chase | 100 cm² (approx. 15 sq. in.) |
When planning these enclosures, I always design a dedicated air chimney behind the appliance. This involves leaving a two-inch gap between the back of the appliance and the wall, which connects directly to a ventilated toe-kick at the bottom and an open slot or decorative brass grille at the top of the cabinetry run. This creates a natural chimney effect, drawing cool air in from the floor and expelling warm air out the top without relying on mechanical fans.
Step-by-Step Guide to Integrating Ventilation in Your Custom Installation
Executing a flawless installation that prioritizes airflow requires careful coordination between the cabinet maker, the general contractor, and the HVAC technician. Here is the exact protocol I follow on our luxury remodeling projects to guarantee long-term structural integrity.
- Map the Appliance Specifications Early: Before cutting a single sheet of plywood, obtain the exact installation manuals for every appliance. Mark the manufacturer's specified ventilation paths directly onto your shop drawings.
- Engineer the Toe-Kick Air Intakes: Cut dedicated slots into the sub-toe-kick platform. I prefer to use custom-milled wooden grilles or flush-mounted metal registers that match the hardware finish, ensuring the intake looks intentional rather than like an afterthought.
- Construct Rear Air Chases: When building tall utility cabinets, construct the cabinet boxes with a shallower depth (e.g., twenty-two inches instead of twenty-four) to naturally create a two-inch utility and ventilation chase against the drywall.
- Apply High-Performance Vapor Barriers: Apply self-adhesive, heavy-duty aluminum vapor foil to the undersides of upper cabinets flanking the range and directly above the dishwasher. This directs rising steam away from the wood joints.
- Redirect HVAC Floor Registers: If a heating or cooling duct terminates under a cabinet run, install a sealed toe-kick duct kit (such as a Toekick Ductor) to channel the air cleanly out to the room rather than letting it dump raw, conditioned air directly into the cabinet carcass.
- Verify Airflow Paths Post-Installation: Before installing the final appliance panels, use a simple smoke pen or a piece of tissue paper to verify that air is actively drawing through the toe-kick and exhausting out the designated exit points.
Material Strategies: Selecting the Right Substrates for High-Exposure Zones
While design layout is critical, the materials you specify for your cabinetry play an equally vital role in how well the installation handles environmental stress. In high-exposure zones—such as the cabinet box directly above a cooktop or the panels surrounding a steam oven—I advise against using standard particleboard. It behaves like a sponge when exposed to moisture, swelling and losing its structural integrity rapidly.
Instead, specify marine-grade plywood or exterior-grade MDF (such as Medex) for these specific cabinets. These materials utilize water-resistant resins that resist delamination and swelling under high humidity. For the doors, if you are using solid wood, ensure your cabinet maker utilizes a traditional cope-and-stick or mitered joint with space allowed for expansion panels. For modern flat-panel doors, a premium wood veneer over a stable, moisture-resistant MDF core will always outperform solid wood in areas prone to temperature and humidity fluctuations.
Advanced Ventilation Questions Answered
- How do I handle ventilation for a flush-mounted induction cooktop with an oven underneath?
- This is one of the tightest configurations in modern kitchen design. Induction cooktops generate significant heat beneath the glass surface and rely on internal fans to cool their electronics. You must design a minimum of a half-inch horizontal air gap directly beneath the cooktop countertop edge, coupled with a recessed back panel on the oven cabinet below to allow the hot air to escape down into the toe-kick area.
- Can I completely conceal a range hood inside a custom wood canopy without damaging the cabinetry?
- Yes, but it requires a high-quality stainless steel liner that completely covers the exposed wood underside. The liner must seal tightly to the exhaust fan insert. Any exposed wood inside the canopy will trap grease, heat, and moisture, creating a major fire hazard and causing the wood joints to fail. I always extend the metal liner one-quarter inch past the wood edge to create a drip edge for condensation.
- What are the signs that my existing cabinetry is suffering from poor ventilation?
- The earliest warning signs include doors that rub against their frames only during cooking or humid seasons, bubbling or cracking of the finish along the bottom edges of upper cabinets, drawers that stick, or a musty smell inside your sink or appliance cabinets. If you notice these issues, it is critical to address the airflow path before mold develops or the wood fibers permanently warp.